Troubleshooting CalibrationUpdated 6 months ago
Because of the complexity behind the calibration process, there are many variables which can influence the success and quality. This guide will walk you through troubleshooting calibration so that you can get started creating lightshows as soon as possible. Keep in mind, your snapshots may come out a bit distorted as they are dynamically generated pixel-by-pixel to reflect the perspective of your projector. However, following this article will provide the best possible result.
How to Troubleshoot
Using this guide to address issues while calibrating can be broken down into the following steps:
- Find an issue below which reflects the state of the calibration images.
- Follow the provided instructions and attempt to calibrate again. There may be different sections for the Luxedo Projection System v3, v2 and LuxCast, so be sure to follow the instructions for your device's model.
My snapshot appears distorted!
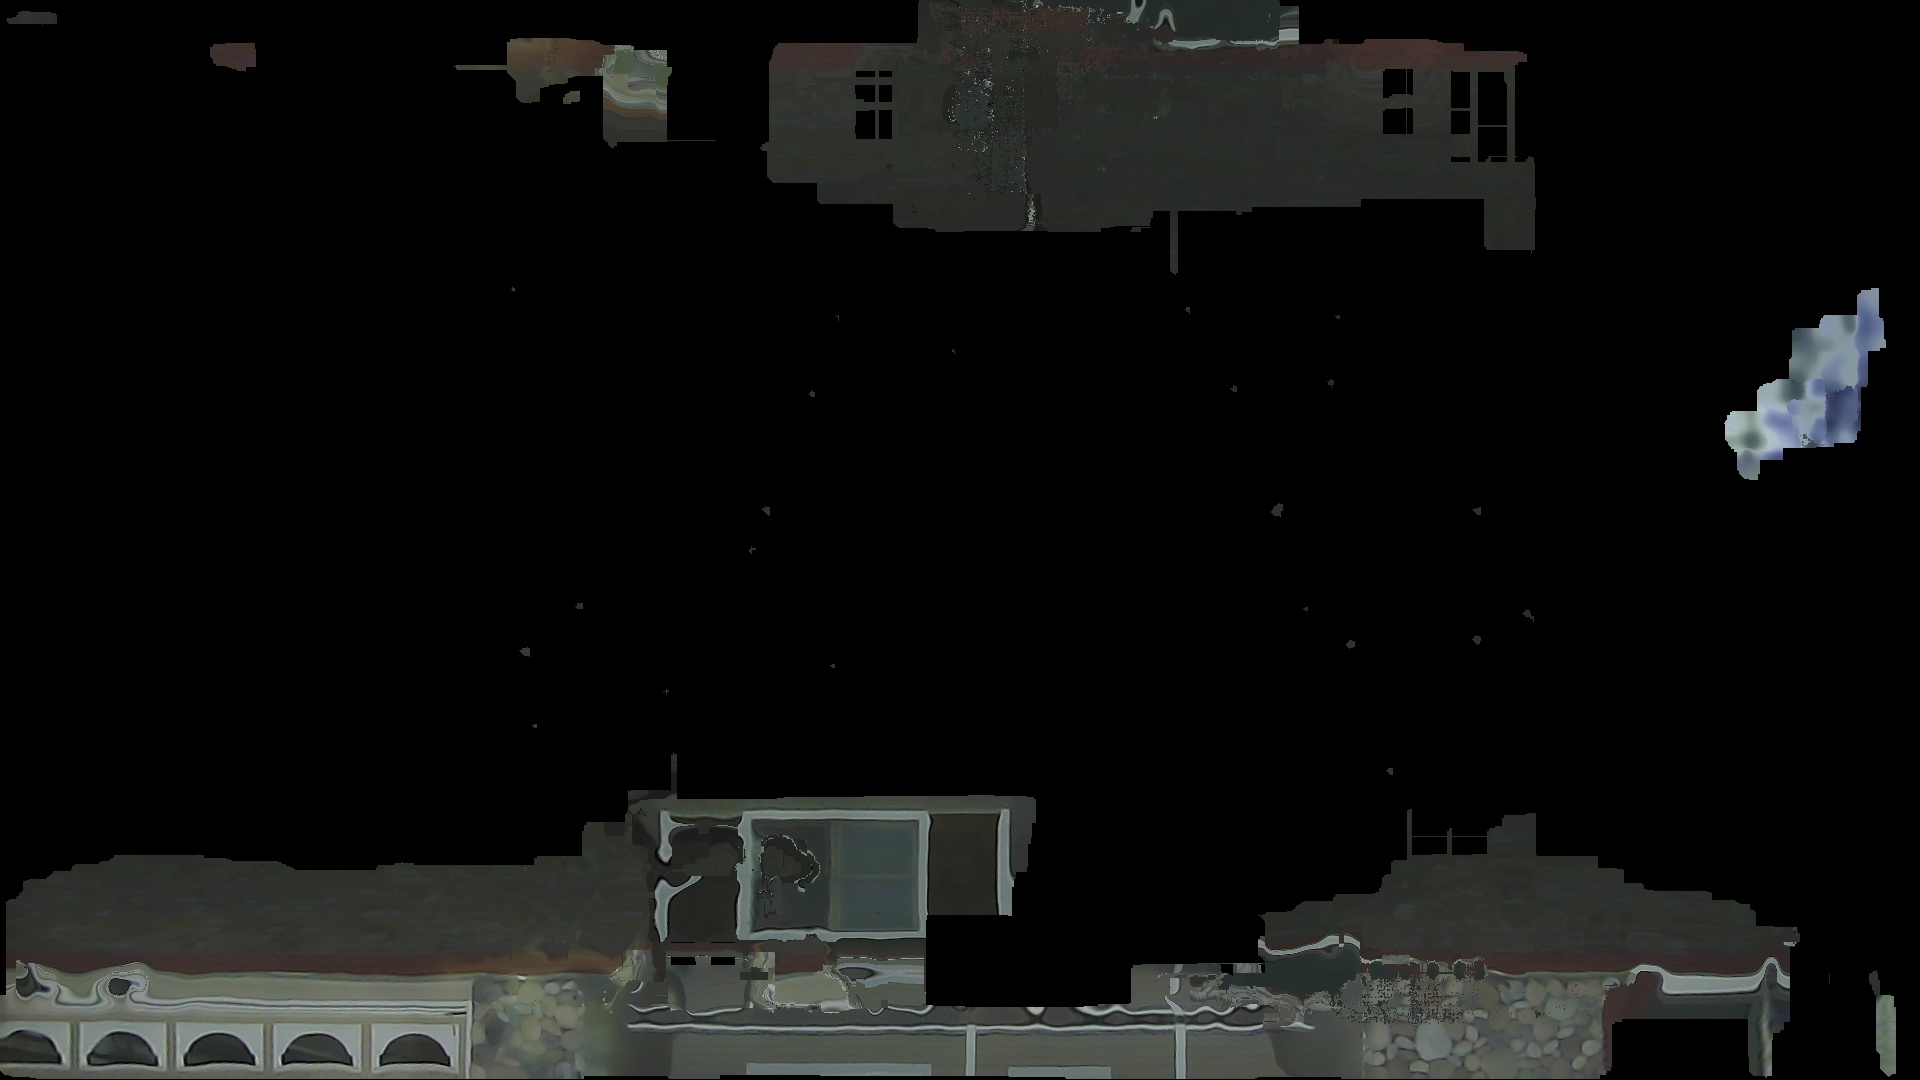
Automatic snapshot generation is a complex process, and not simply a 1-to-1 replication of taking a picture. It's a composite sketch built pixel-by-pixel based off of complex calculations taking place under the hood. As a result, calibration images will often look distorted in some capacity, with black spaces in the image. Below is a high-quality calibration image:
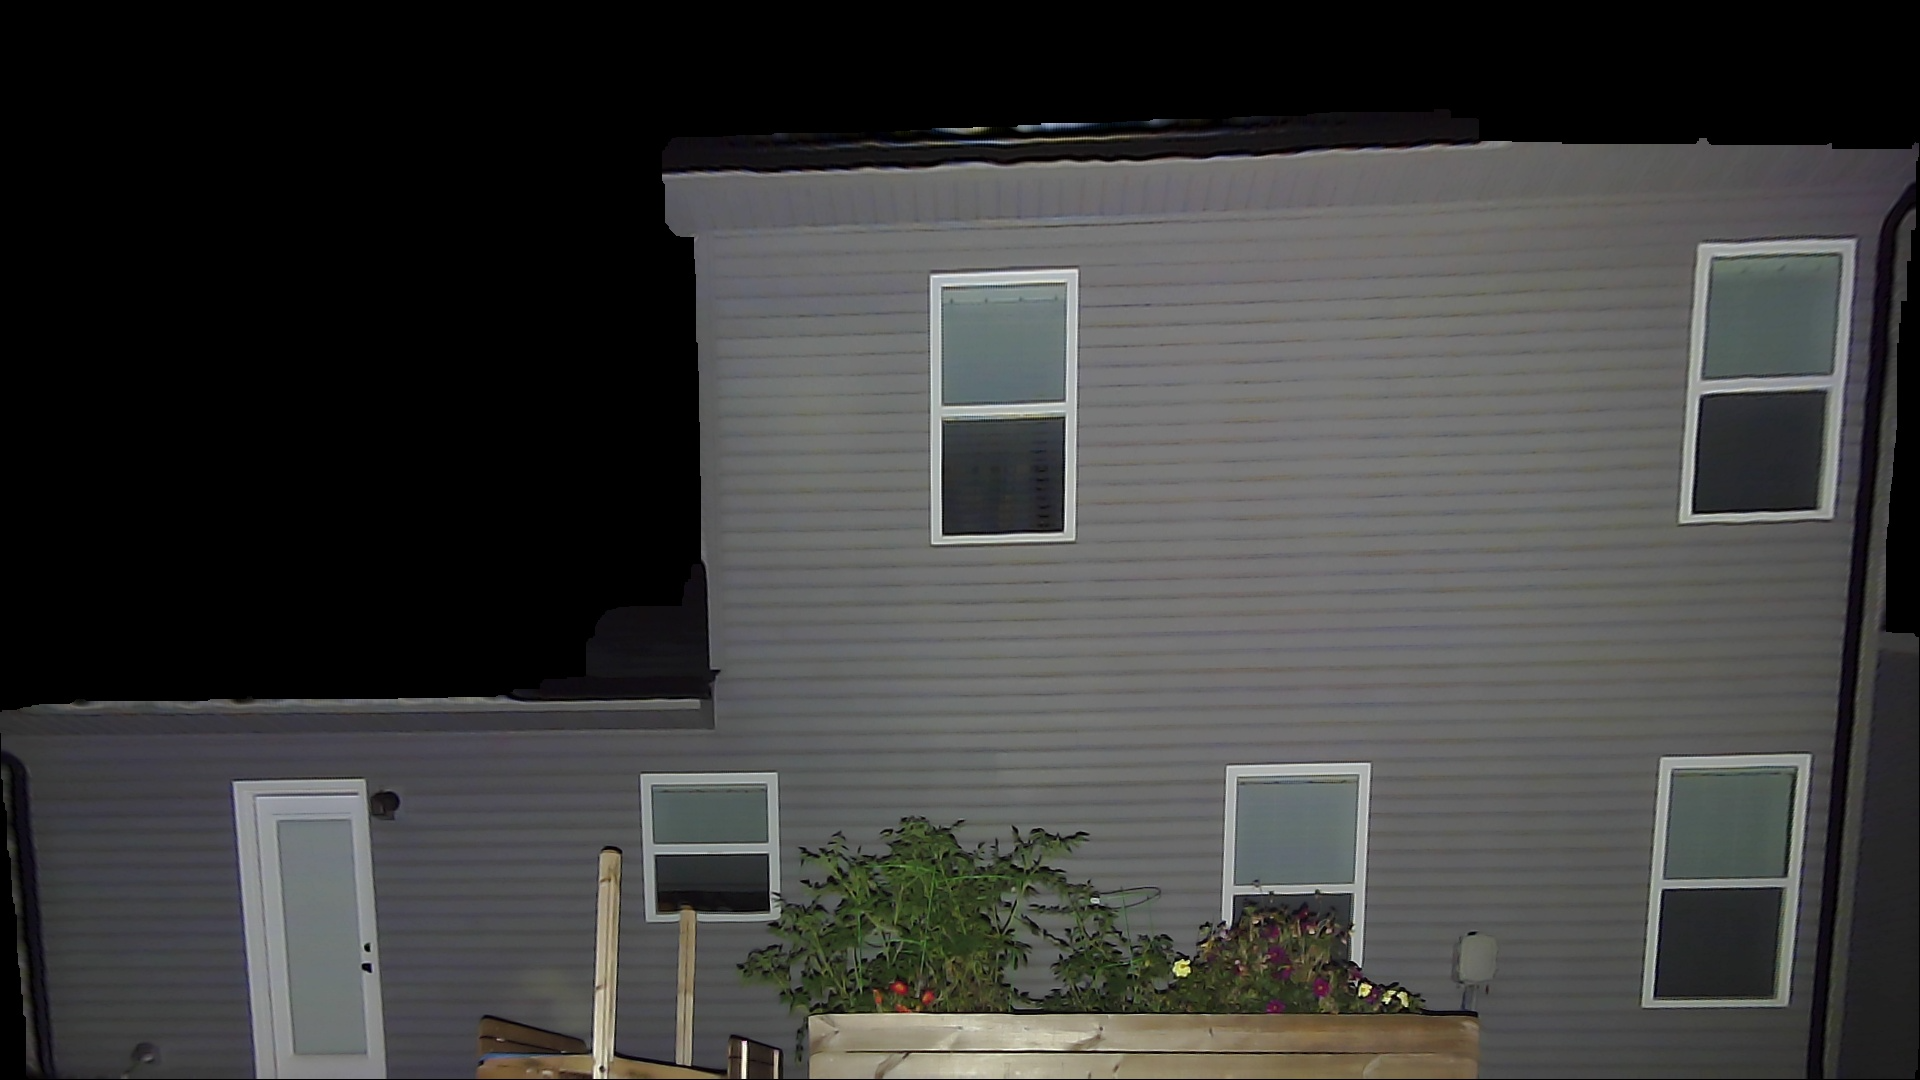
Additionally, if there appears to be a black spot in a window, covering the roof, or on the house This is a purely aesthetic effect, and it will not stop you from projecting onto that space.
If you can clearly recognize your house, and the facade is not being heavily obstructed, you will not need to recalibrate.
My snapshot is too dark
If your snapshot looks a little something like this:
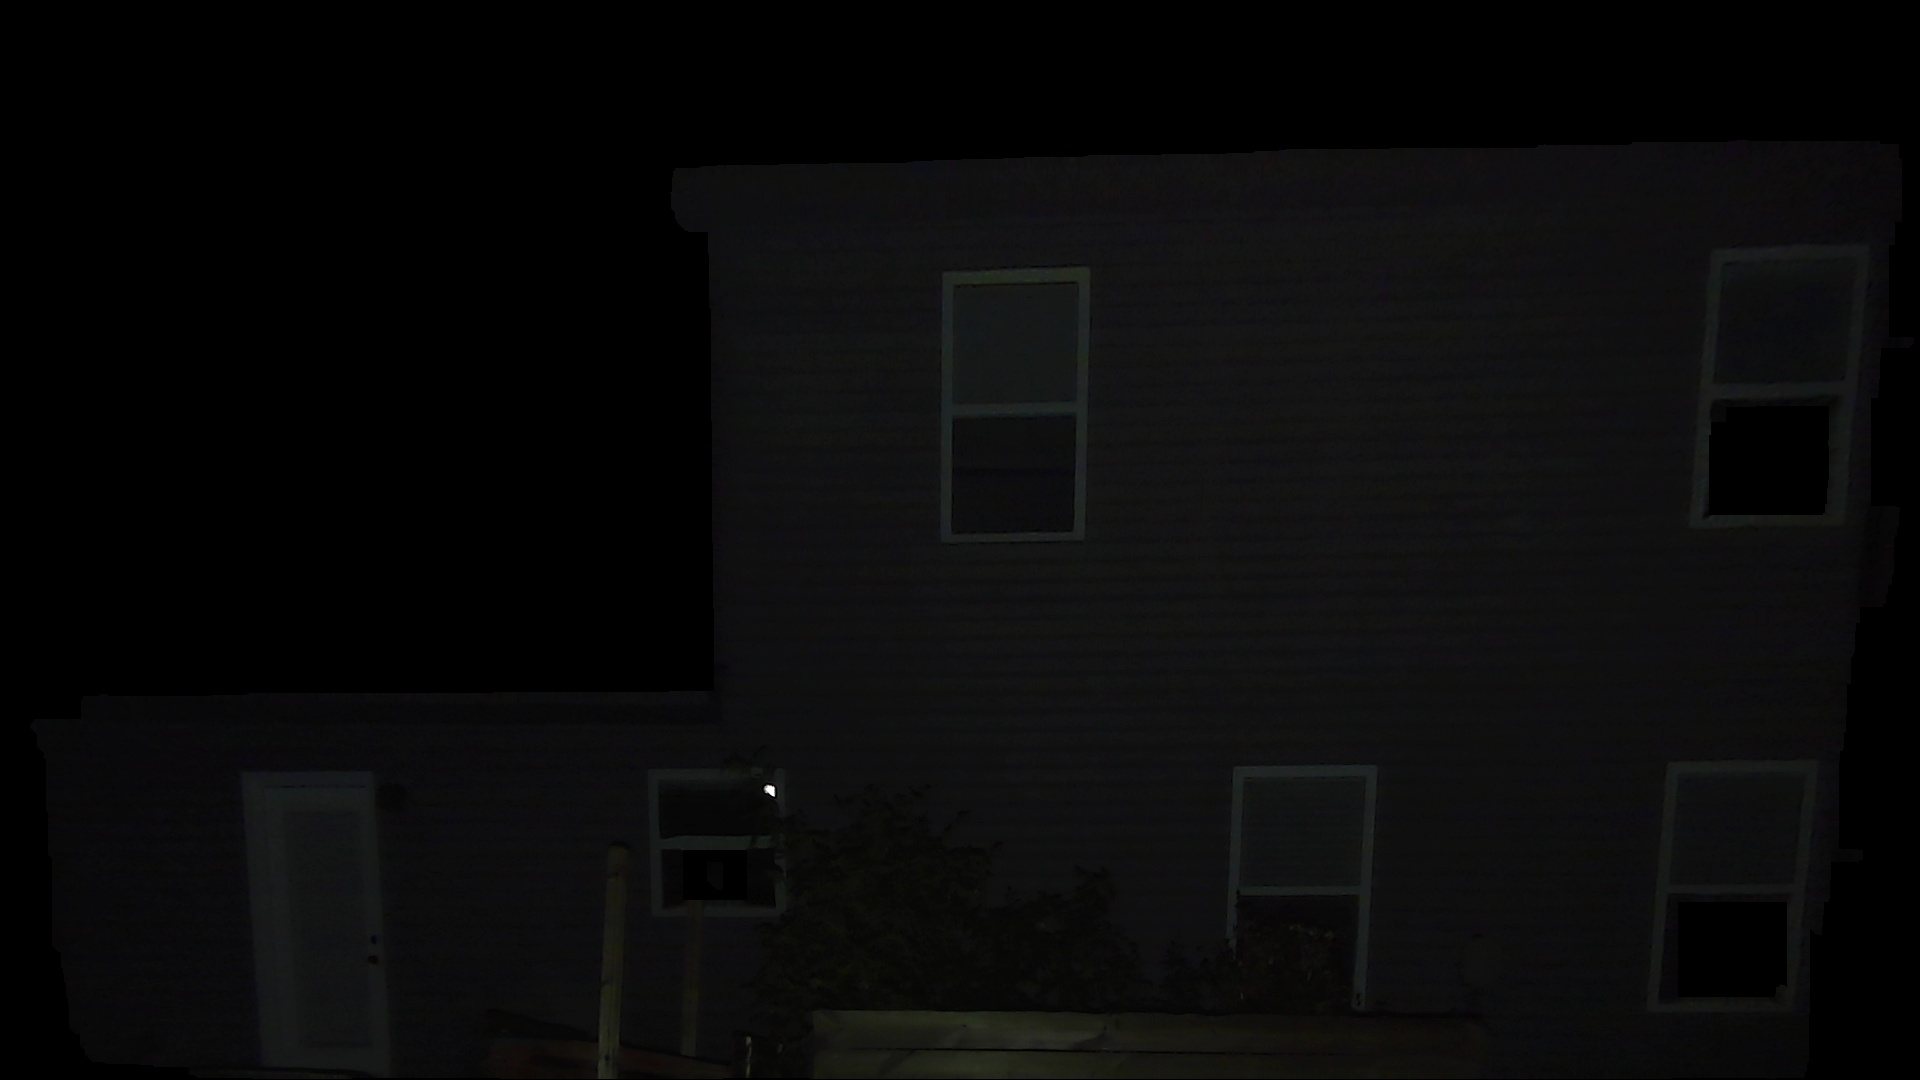
Here, the shape is clearly visible but the image is very dark and difficult to make out, you can correct this by taking a new snapshot during the day, without having to recalibrate.
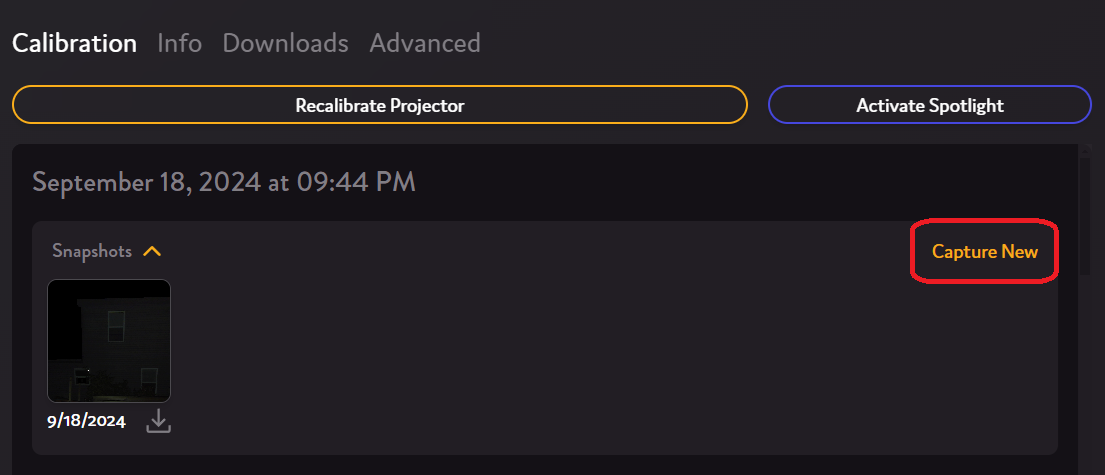
1. During the daytime, go to your Luxedo App and find your snapshot:
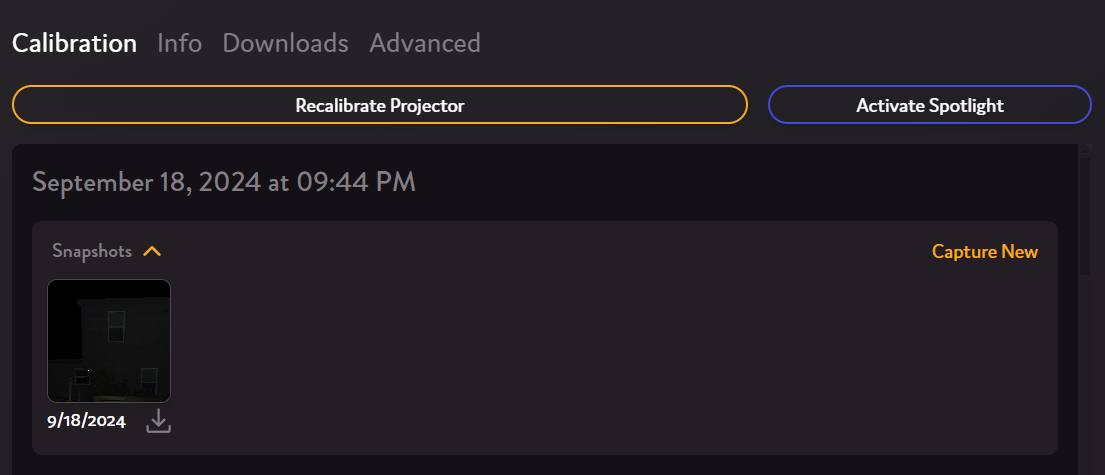
2. Select Capture New:
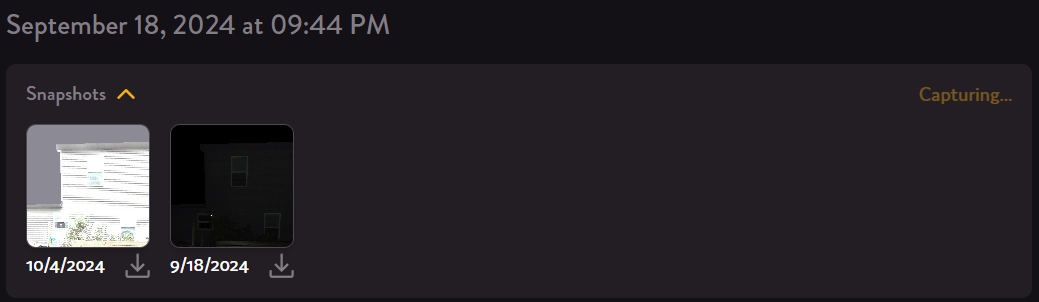
3. You should see a new snapshot appear next to the first one:
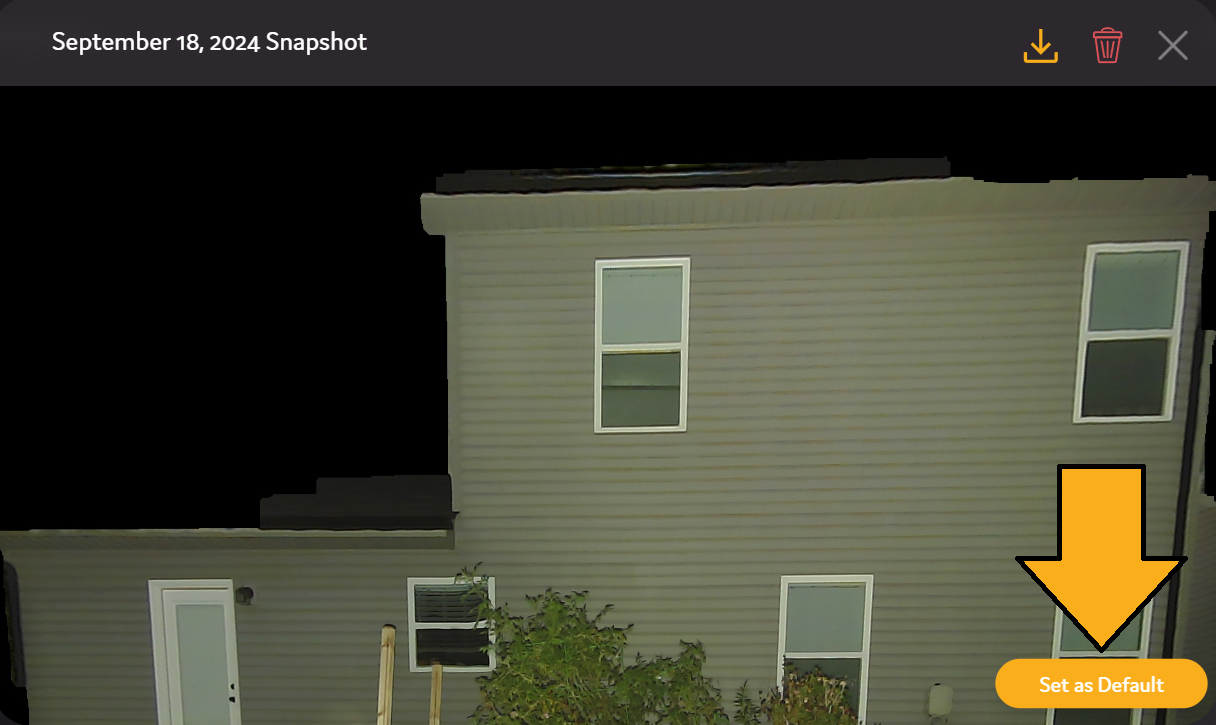
4. Click on your new snapshot, then set it as your new default:
There is a bright reflection inside the glass
or I can see a reflection of the internal camera in the images
Luxedo Projection System v3
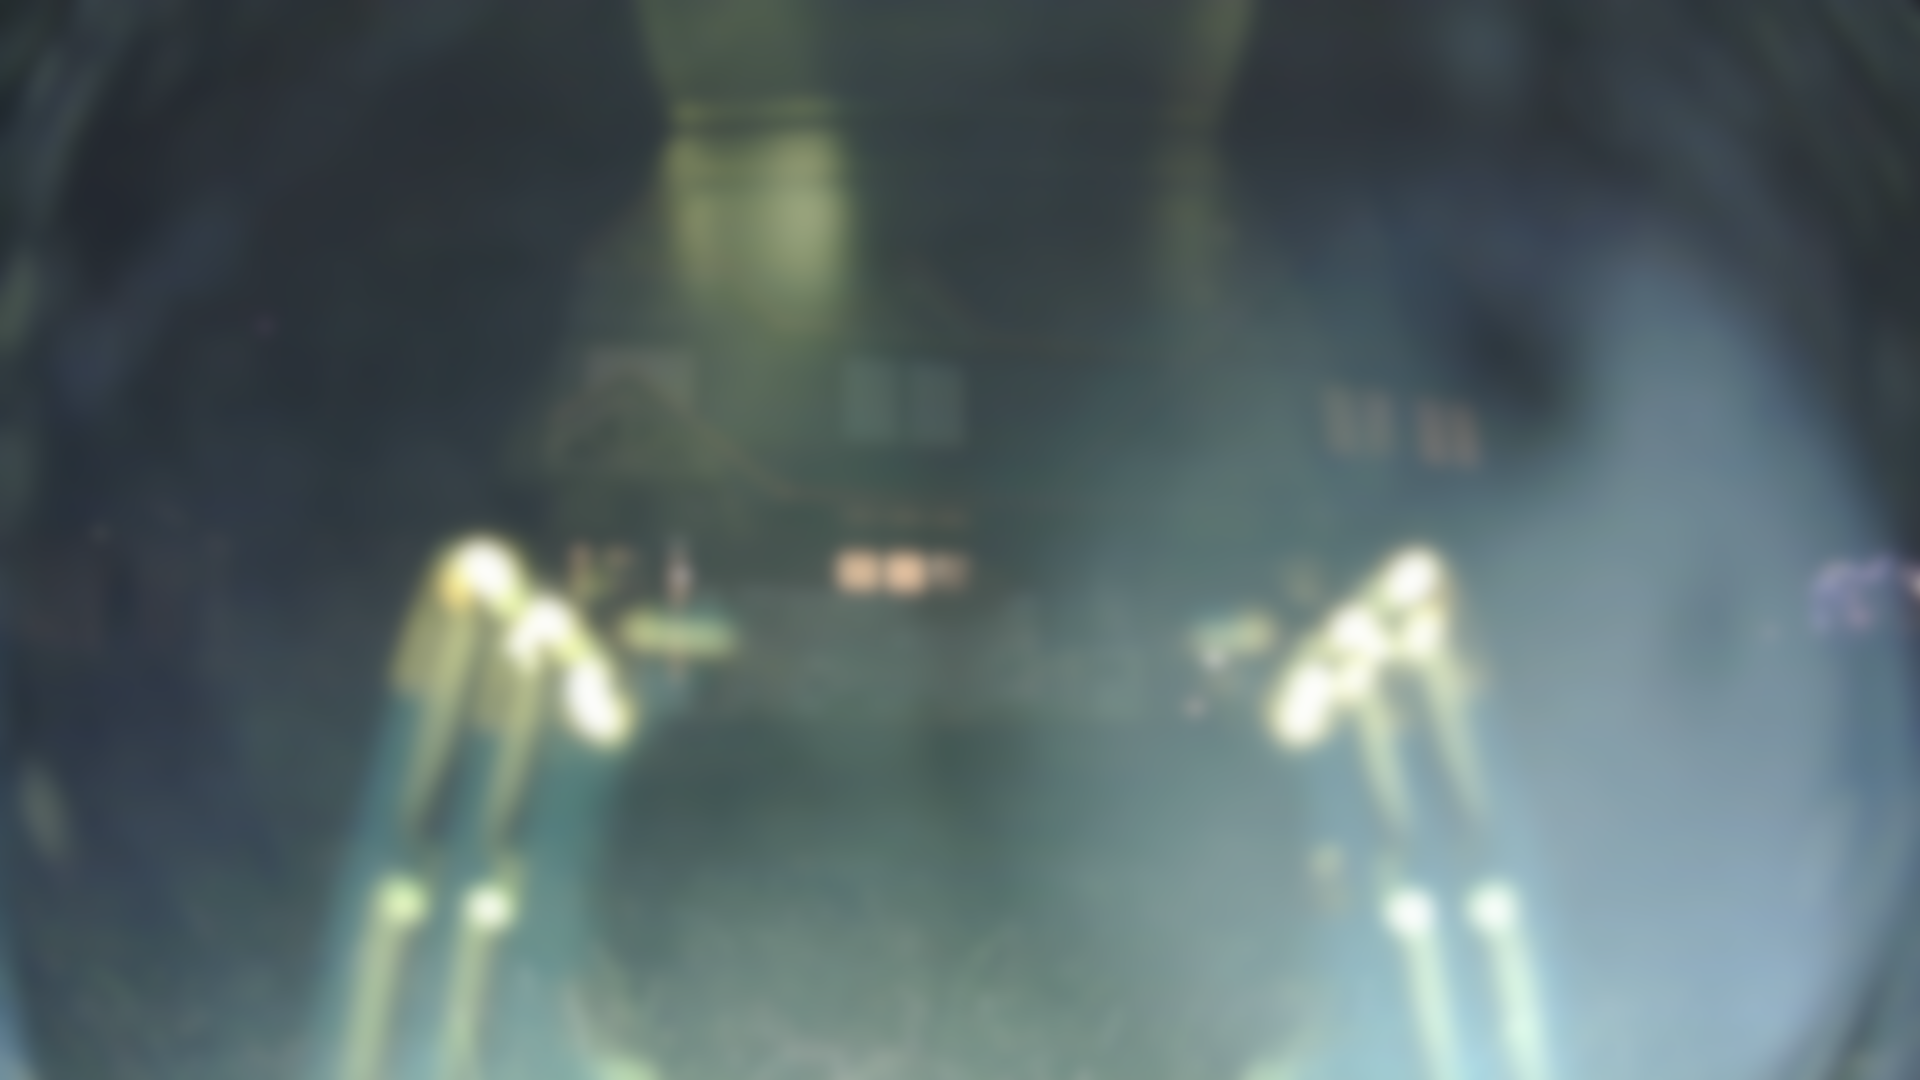
With the new v3 Luxedo Projection System, there are less variables which can potentially influence calibration, however, there are still a few. The most common reason behind a failed calibration or distorted snapshot is internal reflection. If your images look similar to the ones below, then you are most likely encountering an internal reflection issue:
Luckily there are several steps to address this:
- Follow this guide in order to remove the camera enclosure, then screw it back in so it's flush with the glass.
- You can also put something small, like a folded bit of paper between the projector and the camera enclosure in order to ensure the camera is as flush with the glass as possible.
- If your camera doesn't look like the camera in the video, it means you most likely have an older model of V3, in which case you should contact us so we can ship out a camera cover to best address the glare!
Luxedo Projection System v2
If there appears to be a large amount of internal reflection while calibrating your Luxedo Projection System v2, the internal projector is likely too far back. To fix this, simply push the projector as far forward as possible (the projector lens should be touching the front glass).
The images appear dim and it is hard to see the light bars
If the calibration images or snapshot appear too dark, the exposure settings of the calibration are likely too low. To fix this, it is recommended to calibrate again at a higher Exposure Level. To do this, follow these steps:
- From luxedo.app, go to the advanced settings of your projector:
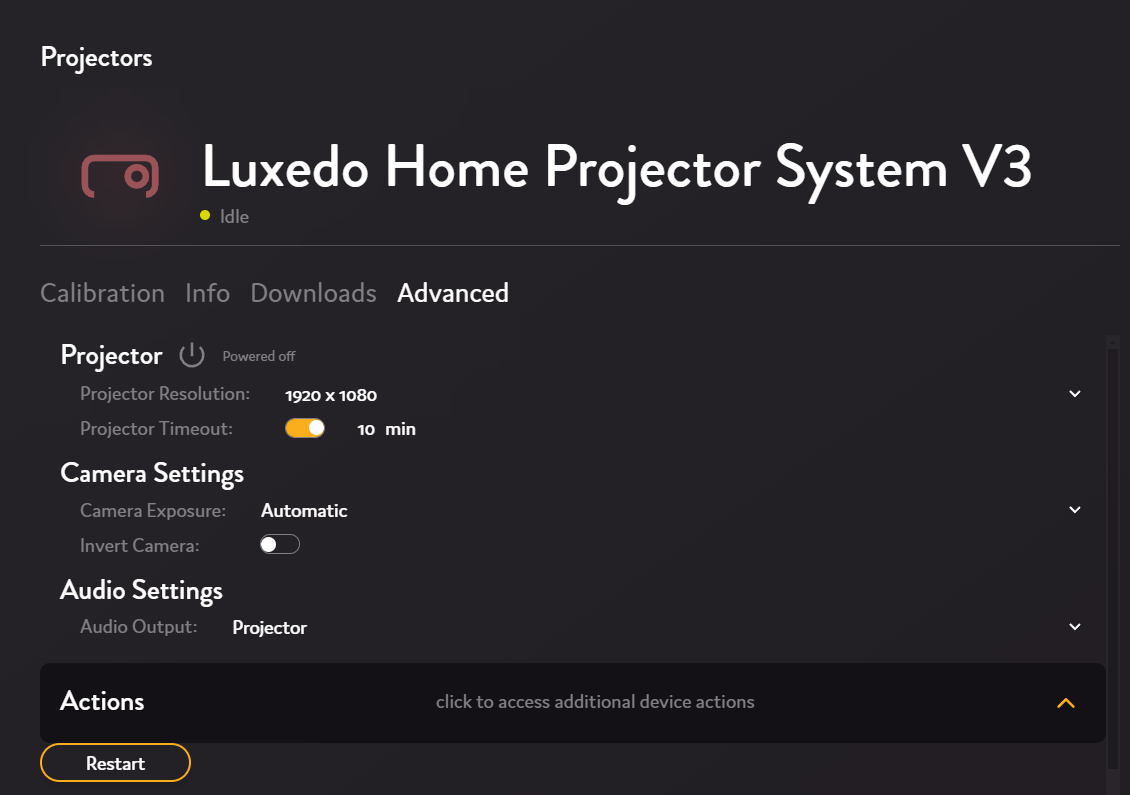
- Under Camera Exposure, change the settings to "High" or "Very High"
- Once you've changed these settings, please re-attempt calibration.
It is daylight in the images
or
The projection space is completely lit up
Because calibration requires the internal camera to capture each projection, a completely lit up space is likely to cause a calibration attempt to fail. To fix this, simply attempt to calibrate when it is dark.
The projector showed a blank blue screen
or
The projector showed a "No Signal" dialogue box
During the booting sequence of your projector, it is standard to see a blue screen flash. If, however, you repeatedly see the blue screen even after initially turning on, you may be encountering a bigger issue!
- First, open up the enclosure and verify that the HDMI is plugged in securely.
- Check that the internal projector is configured to the same input source the HDMI cord is plugged into (e.g., HDMI1).
- Make sure that your device is updated past version 3.8.0 (visible under the info tab in your projector portal)

- Under advanced settings, find and select "Apply HDMI Fix"
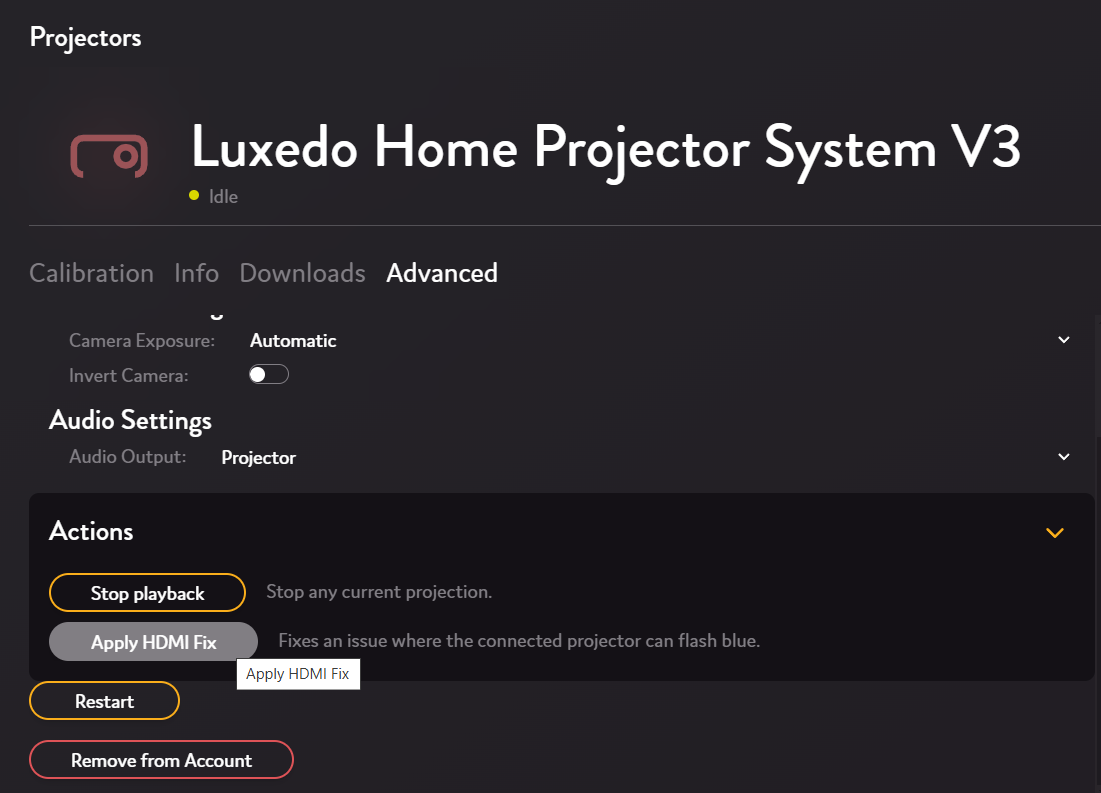
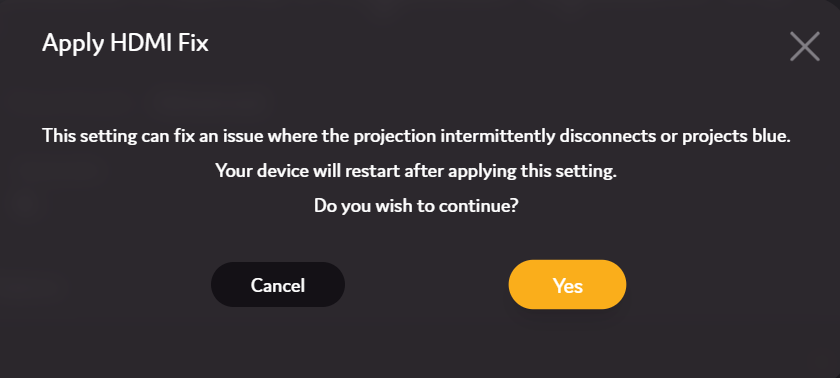
- If you're still encountering the issue, please unplug and replug your device and contact support if the issue persists.
The projector or camera moved between shots
Any movement caused to the camera, internal projector or entire Luxedo System will almost always cause a calibration to fail. Always make sure your device is steady and kept perfectly still when calibrating.
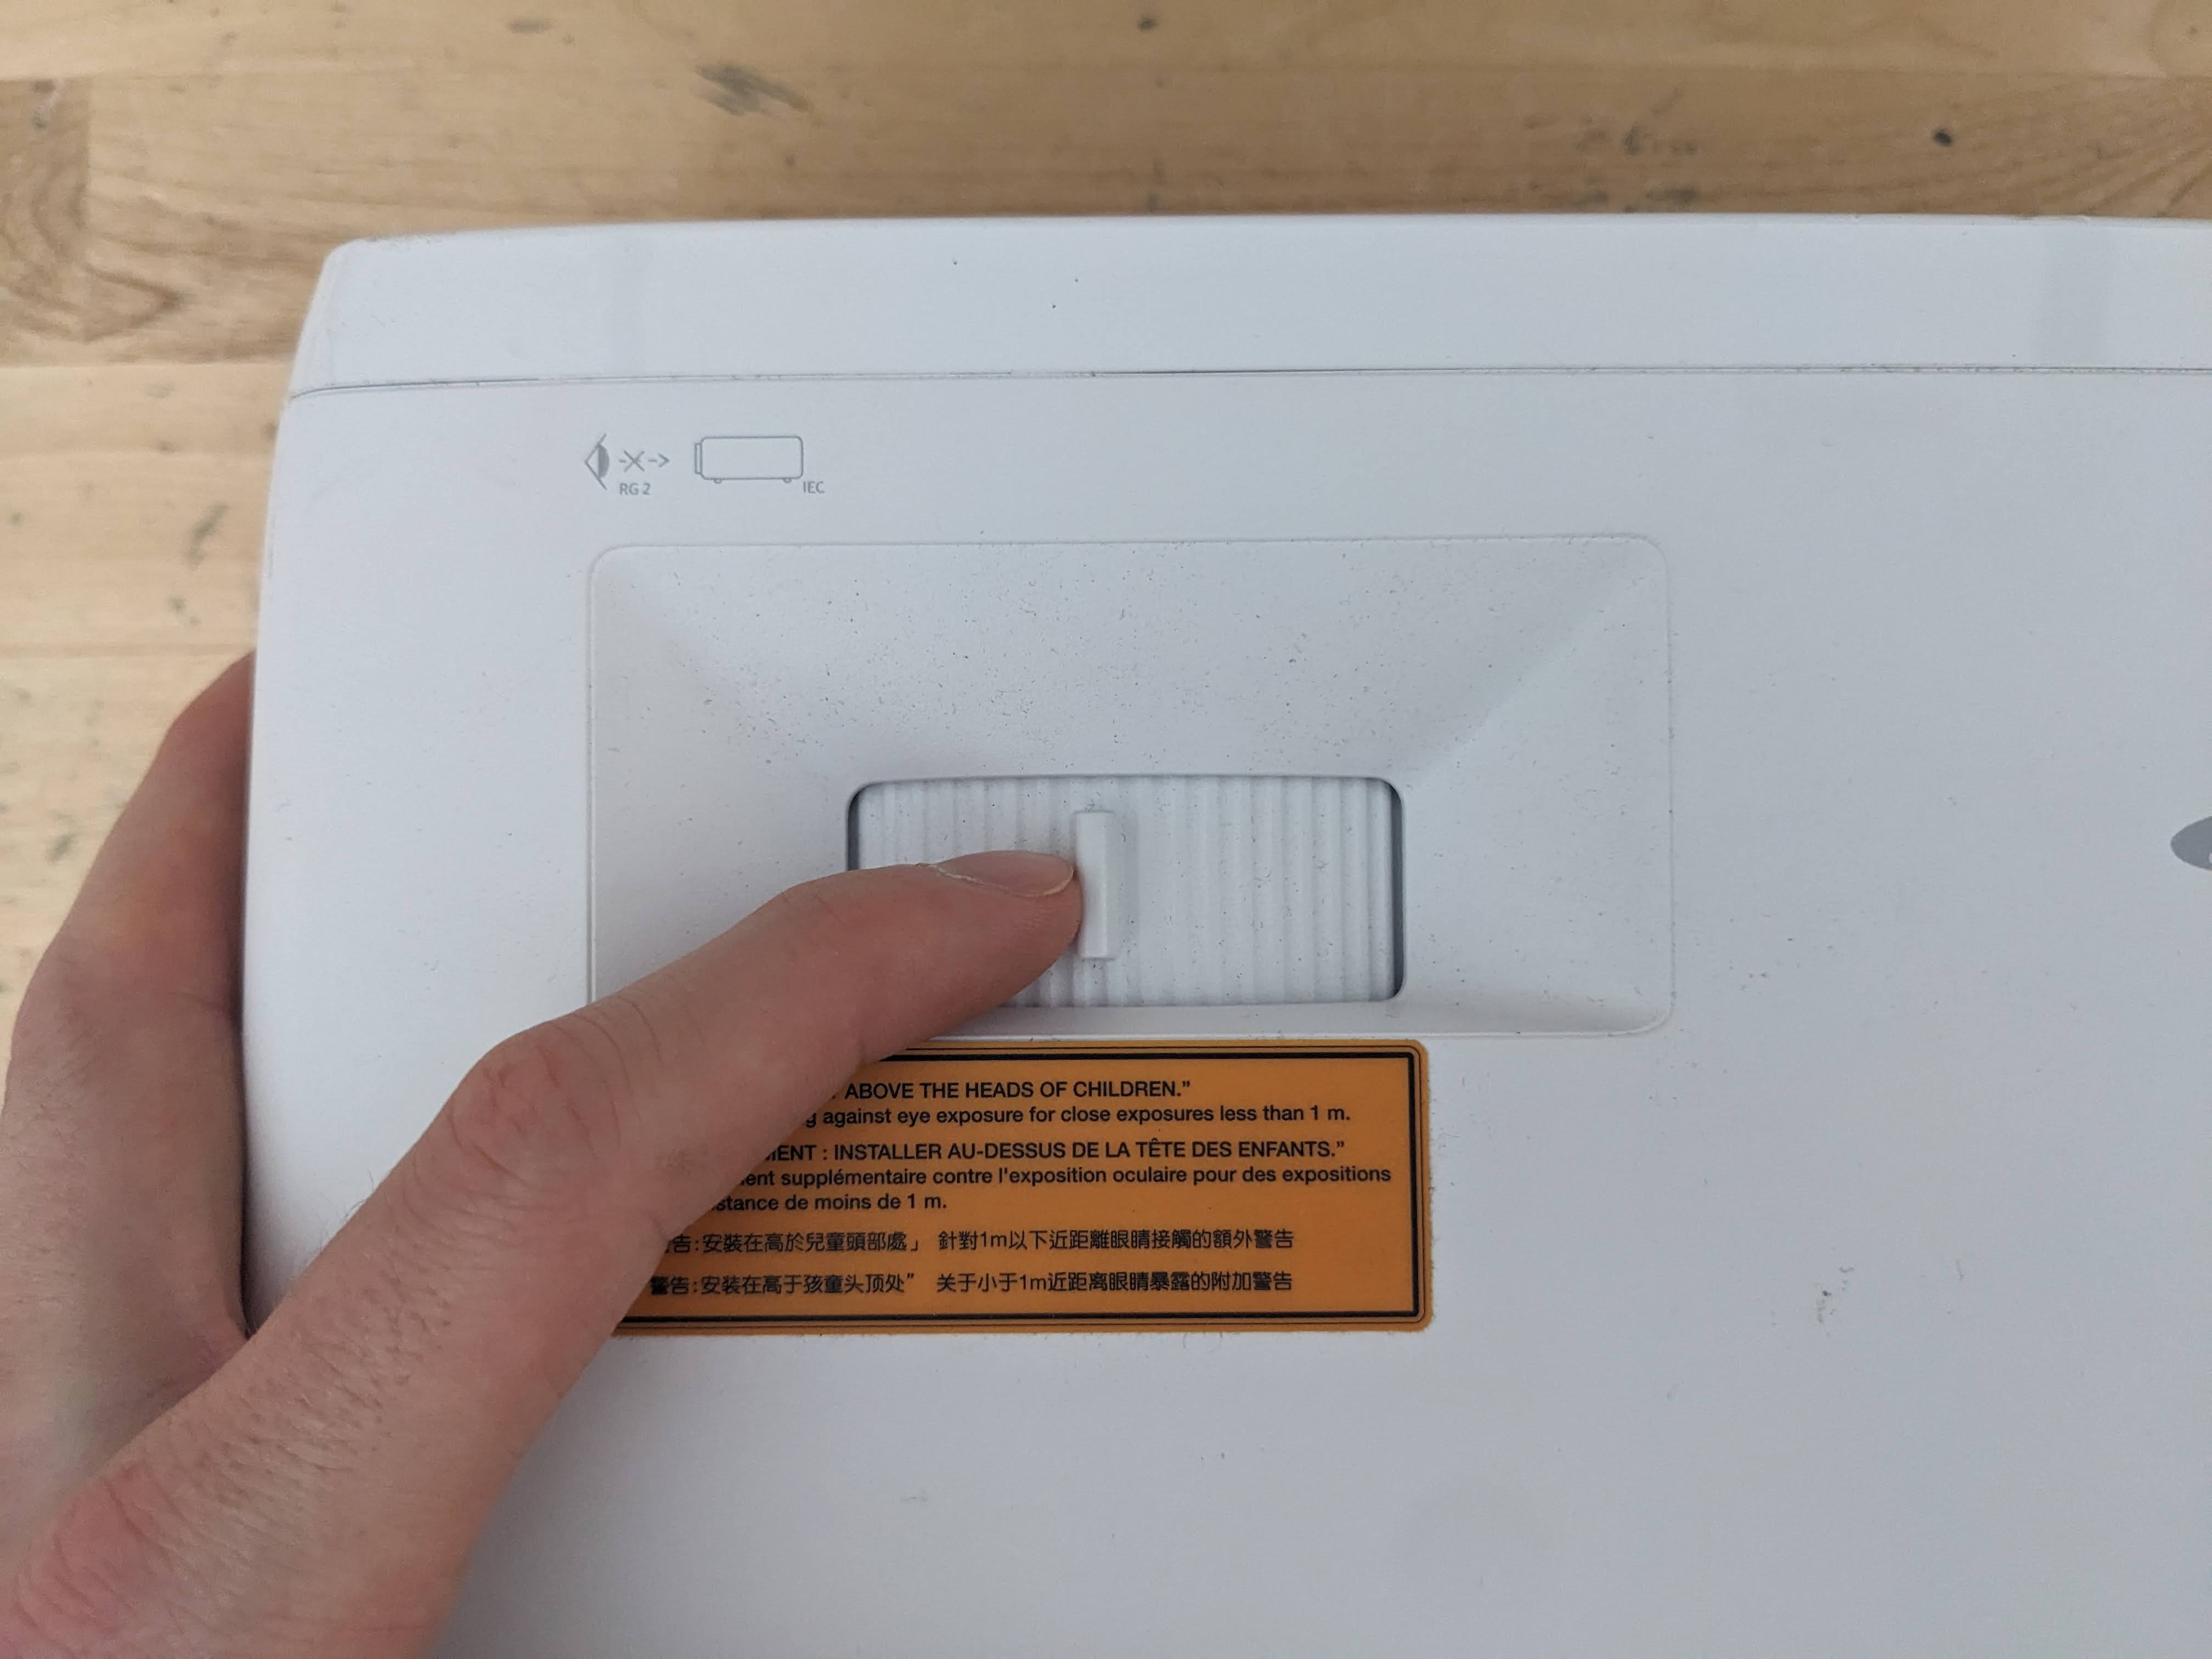
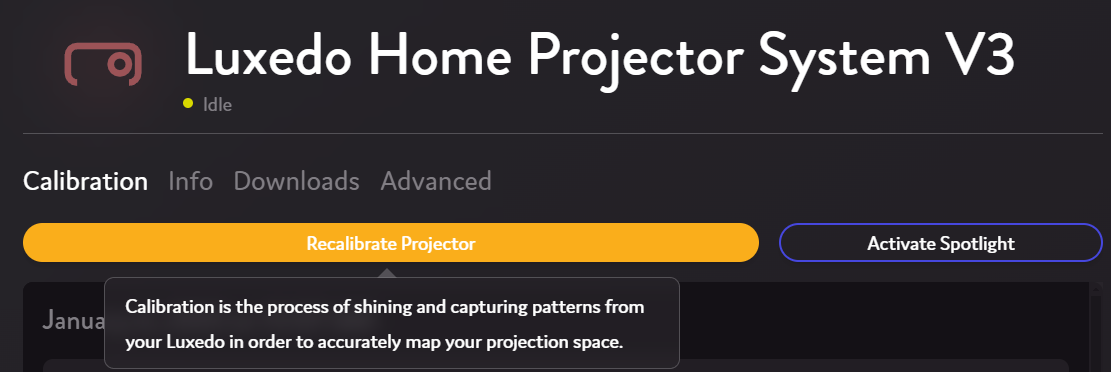
The bars appear blurry in the images and in person
A blurry projection is usually the result of the internal projector being out of focus. To focus your device, activate the projector spotlight ( or
or  ) and adjust the focus slider until the projection is clear and sharp.